Properties
Object properties define an object's status, look, and situation. Read the project guidelines to understand each property's meaning.
These allow you to select a value from a list or create connections to other objects. The property values you choose affect which markings you set in the property markings section.
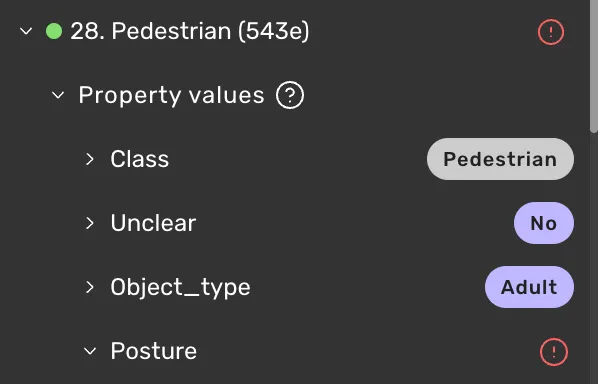
Property values will vary based on what task you're working on. The project guideline will inform you about how and what to consider when setting a value.
Grey property chips
These indicate consistent values. Consistent properties have one value throughout a sequence or all camera sources.
Purple property chips
These indicate varying values. Varying properties can have different values throughout the sequence or camera sources. In other words, these are frame or camera-source specific.
Alert symbol
If a property is required, a grey alert icon will appear next to it. The symbol indicates it must have a value before submitting a task.
If the symbol is red, you skipped or unselected the value, which must be set.
Copy Properties
Copies all properties from the selected object to your clipboard.
How to use:
- Click the clipboard icon in the Properties panel
- Right-click object → Copy Properties
- Keyboard shortcut: shift+ctrl+c (Windows/Linux) or shift+cmd+c (Mac)
Requirements:
- Object must have properties already set


Paste Properties
Pastes previously copied properties to the selected object.
How to use:
- Click the paste icon in the Properties panel
- Right-click object → Paste Properties
- Keyboard shortcut: Ctrl+v (Windows/Linux) or cmd+v (Mac)
Requirements:
- Properties must be copied first

Duplicate Properties
Automatically finds a similar object and duplicates its properties.
How to use:
- Click the duplicate icon in the Properties panel
- Right-click object → Duplicate Properties
Requirements:
- A similar object with properties must exist

Link property
In some tasks you are asked to connect objects.
- Click on "+ Add connection" button in the menu, you will then be prompted to select another object.
- Click on the other object in the 3D scene or the 2D image
- In the right-side menu the object ID should appear to indicate they are linked.

Leading sensor
In multi-sensor tasks, an object can be seen by more than one lidar sensor. Some of these tasks ask you to pick which sensor leads for the object — the one whose data the object's shape is primarily based on.
The leading-sensor property works like other property values, but instead of plain options, it shows one colored row per sensor, matching each sensor's color in the scene. The chosen sensor appears as a colored pill on the property.
Expand the property to see the available sensors
Click the sensor you want to set as the leading one
To change the value, click the colored pill to clear it; the list of sensors reopens so you can pick another.
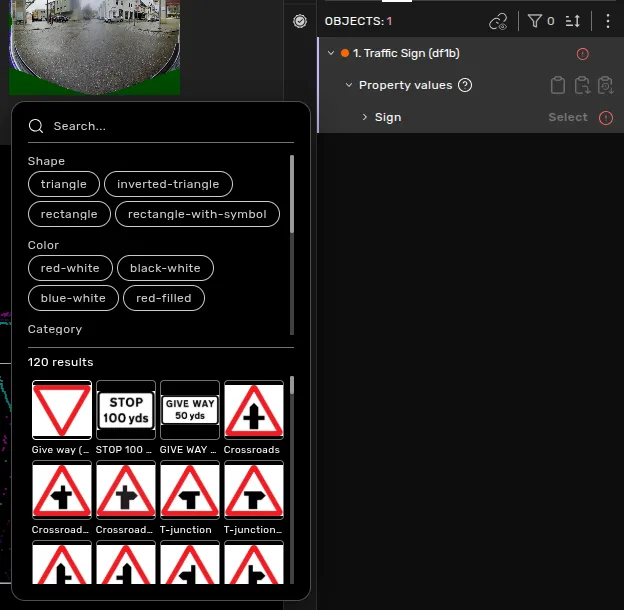
Image selector
In some tasks you are asked to select from a list of images.
Click on "Select" top open the image selector
Use the search bar or filters to find the image you're looking for
Click on the image to set it as a property value
You can use taband shift+tab to switch between the image options and select the current selection with enter
Editing a property value
Expand property
Click on the expand symbol next to the property name. This will open the list of options and allow you to select a new value
Deselect the value
Click on the grey or purple chip. The value will be deselected, and the list of options will expand automatically, allowing you to select a new one.
These are marking/shape properties, meaning you don't select a value to set them. Instead, you add a marking on the object - such as a corner or wheel point.
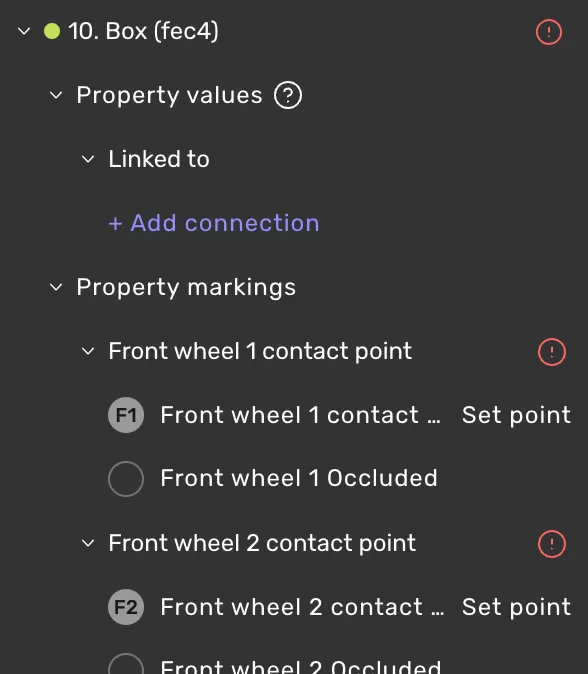
The property marking sections contain marking/shape properties. For these properties, you are asked to add a marking on the object - such as a corner or wheel point.
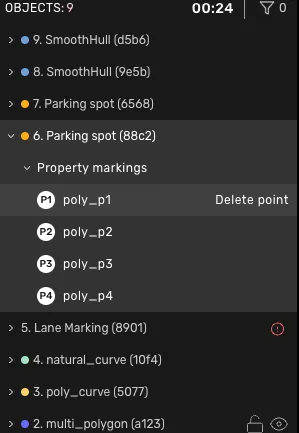
Place a property marking
- Select the mark you wish to place,
- Click where you want to drop the point or line.
Edit a property marking
- Edit the position by dragging and dropping the marking.
- Delete the property marking and re-draw it.
- Assign a property value instead of a marking. This is relevant when you should mark the point as, for example, "occluded" instead of setting a point. If you assign a value to an already set point, the point or line will disappear from the drawn object.
When you select an object that is not fully present in what you are currently looking at, the Properties panel shows a short helper message instead of (or alongside) the usual values:
- The object is not visible in this frame. — The object exists elsewhere in the sequence but has no shape at the current frame. Step to a frame where it is present to edit it.
- The object is not present in the current camera — In a multi-camera task, the object has no shape in the camera source you are viewing. Switch to a camera source that shows it.
- Showing properties from 2D / Showing properties from 3D — You are editing the object from one side of a 2D/3D task while its properties come from the other side. The label tells you which source the shown values belong to.
Where it applies, a Draw connected object shortcut lets you add the missing connected shape directly.