Programmatic checks and task validation
What are programmatic checks?
Using programmatic checks in your project, you can catch specified errors and ensure they are fixed before task submission.
All currently available checks are so-called task validation checks. They locate potential mistakes in the annotation task and run whenever a change is made in the task. These checks either warn the team members or block them from submitting the task while the check conditions are met.
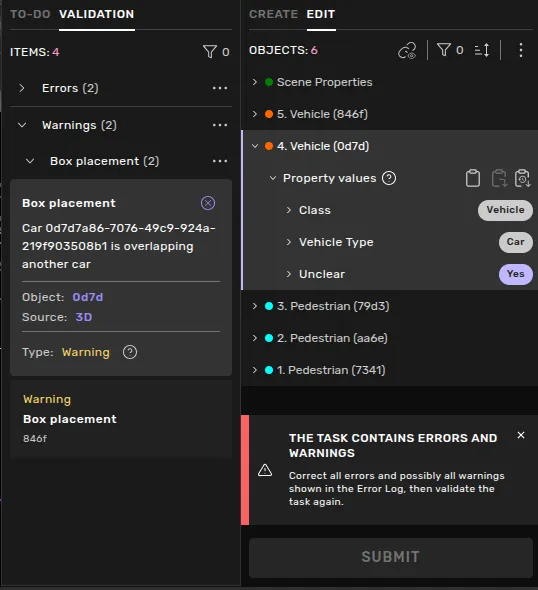
Live checks have replaced the legacy checks, there were previously two parallel systems called custom checks and template checks. These are currently still available but will be phased out. In a project that has custom or template checks configured, these will be converted on the fly to live checks and evaluated live in a team members browser as they annotate.
👉🏻 The chapter Validate task provides more information about the experience of validating a task while working on it.
Configuring programmatic checks
Programmatic checks are configured on a project level. When activated, they are part of the task validation in all of the project's tasks.
You can only configure programmatic checks in projects that contain one or multiple requests, where at least one request has a configured taxonomy.
Live checks
Active live checks are evaluated live in the browser as the annotator is working on a task, a project's live checks can be managed in Project Settings in the tab Programmatic Checks.
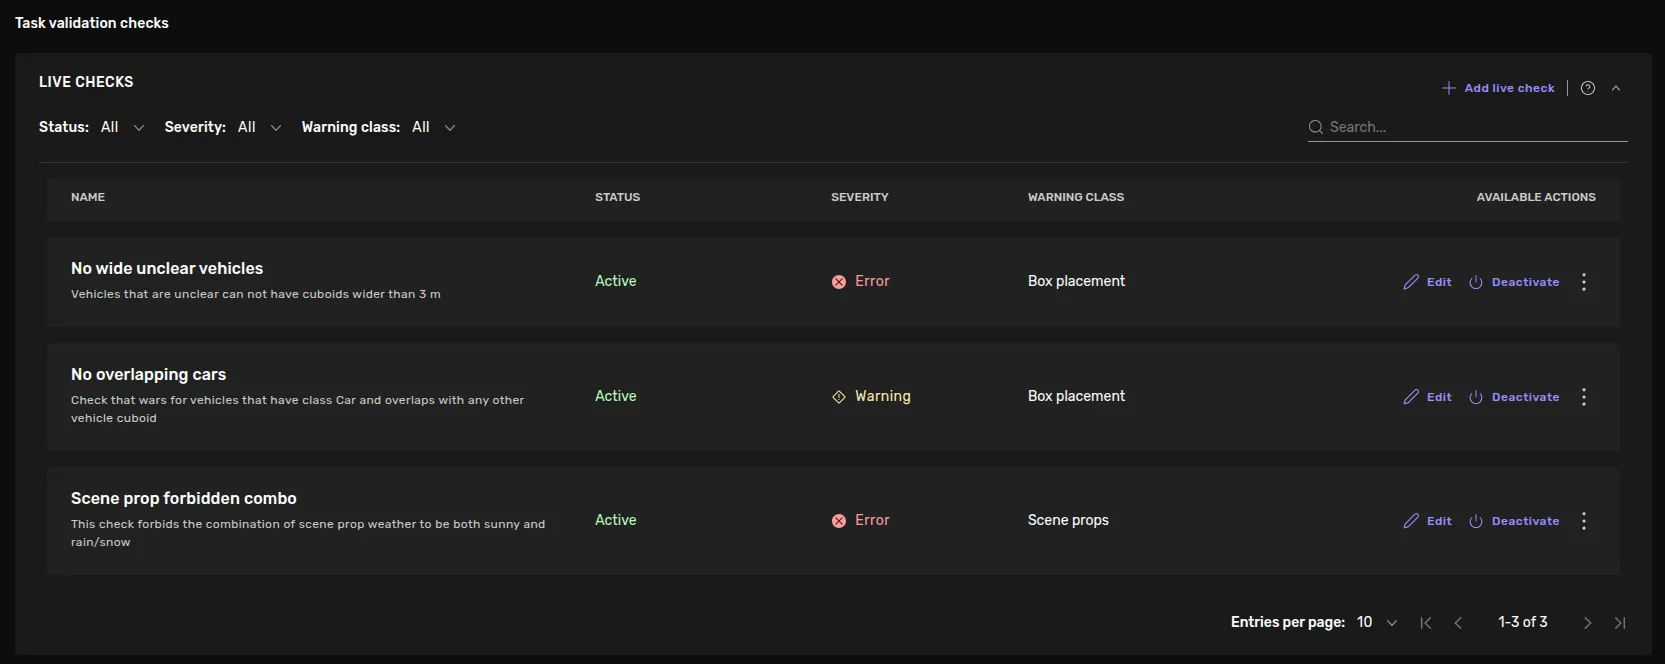
How do I add and configure a live check?
- Press + Add live check in the top right corner of the live checks list.
- Give your check a Name and Description, these will be displayed in the list of live checks and should reflect what the check aims to catch.
- In the Consequence sections you can configure annotator facing values, if a violation of the check causes a blocking Error, or an informative warning is set in Severity. Each check has a Warning class, violations of checks with the same warning class are displayed together in the annotation tool. Here you can also configure the Message shown to the annotator with a few placeholders that can be used to clarify the message.
- Under Scope you can select which Annotation Instruction will be used to generate a taxonomy that in turn will be used to find which classes, geometries and properties that are available for checks to use. You can also limit the scope of the check by selecting one or more Object classes that are available in your taxonomy, these will be used to limit what object classes that can cause check violations.
- In Scope and Condition you configure the actual check. This section contains mainly a JSON editor for the check contents, but also two links: one that copies the configured taxonomy to the clipboard along with a link to the reference guide and the other being a link to the reference guide. The Copy taxonomy for an LLM button enables you to prompt an LLM to provide you with the JSON for a check that will catch what you aim to catch by providing a short description of what you aim to catch as well as the contents of your clipboard. It is also possible to edit the check or hand crafting it from scratch using the JSON editor.
- Click the Add check button to add the check to the list, then activate it by clicking Activate in the list, and don't forget to Save changes. Checks can be edited by clicking the Edit button in the list, and Deleted from the three dots to the right of each item in the list.
How do I test my checks?
There's currently limited support for simultaneous tweaking and testing of the checks, this is under development. We currently recommend you to use task or assignment view links. All activated checks will be loaded when a task is loaded, and evaluated when any of the targeted properties or geometries are changed. This way you can test all your configured checks, and how they catch the errors your annotators might produce.
What can I check for?
The mentioned reference guide details the JSON format and describes all the current capabilities. It also contains some examples of what type of checks can be created. At the top level you will find the Scope and Conditions fields.
The scope determine what the check is evaluated for (such as different types of objects and/or geometries) and the conditions determine what will trigger a check violation. Conditions can be combined with other conditions, and grouped in various ways to support a large array of different types of checks.
A condition commonly consist of either a geometry check or a property check, but it can also look at things such as object links. For an updated view of the current capabilities, please look at the reference available via the Add/Edit check dialog. LLMs are useful in creating and editing checks as well as understanding the available capabilities. Reach out to Kognic if you find the current capabilities to be lacking.